Content of this topic
Basics
Attributes are used to characterize properties and to configure additonal functionalites. There are a number of predefined attributes in plusmeta, most of which are used for priorities and sort orders.
Attributes are also properties themselves, which belong to the class “Attributes”. This is because by assigning it to the Attributes class, the property can be added as an attribute in the Attributes tab of the Edit properties dialogue using the Add button. Continue below for a detailed description of how this works.
System attributes in plusmeta
The attributes already present in plusmeta modify sort orders and priorities. For this reason, they all have the data type Number, which determines the order.
Priorities
If there are several sources for filling in a value, you can use priorities to control which source should be used first.
Example:
Several suggestions are made for the title of an object in the Assign and approve metadata workflow step. These suggestions are based on various sources from which the title can be generated. For example, the title of the PDF(pdf:Title) or the HTML file (html:title) can be used, a title can be read from the HTML text (plus:SimpleHTMLTitle), or a title can be compiled from certain metadata of the object (plus:GeneratedTitle). There are properties in plusmeta for each of these title candidates. Which of the title candidates is suggested by default is determined by the title priority attribute(plus:titlePriority). The property that has the Title priority attribute set to "1" has the highest priority and is therefore listed at the top.
Sort orders
You can use a numerical value (1 = first) to specify the desired sort order of properties in specific views.
Example:
The Metadata sort order attribute can be used to specify a preferred order of extracted metadata in the Assign and approve metadata workflow step. To do this, the attribute must be assigned to the metadata properties with a corresponding numerical value. For example, it is possible that the metadata Product variant is always displayed at the top. The prerequisite for this is that it was automatically added during metadata extraction or was added manually. Otherwise, the extracted metadata appears with the next highest attribute value at the top.System attributes overview
The following attributes already exist in plusmeta:
| Attribute | Data type | Function | Default setting |
|---|---|---|---|
| Object label priority | Number | Specify the priority for the source of the generated object label. Note: The object label is different from the name of the source file. You can imagine the object kind of as a frame around the file. The name of the “frame” is the object label. Various candidates (system role = title property) are available for the object label, which can be prioritized with the attribute Object label priority. | Clean file name = 1; Assumed HTML/PDF title* = 2 |
| Title priority | Number | Specify the priority for title candidates. Note: See example Priorities. | Assumed HTML/PDF title* = 1; Title (HTML/PDF)** = 2; Clean file name = 3; Generated title = 4 |
| Metadata sort order | Number | Specify the order in which the metadata per object is listed in the Assign and approve metadata workflow step. Note: See example Sort orders. |
Title = 1; Language = 2; Product variant = 3; Component = 4; Organization = 5; Document type = 6; VDI 2770 document category = 7 |
| Title part order | Number | Specify the order in which the metadata of the generated title candidates are arranged. Note: In plusmeta, a generated title is created per object from certain metadata of the object. The system role Title part makes a metadata property a part of the Generated title. The order of metadata ist determined by the attribute Title part order. | Organization = 1; Product variant = 2; Document type = 3; Language = 4 |
| Title part separator level 1 | String value | Specify the separator to be placed between different title parts. | “_” DE,EN_operating_instructions_PI-Fan |
| Title part separator level 2 | String value | Specify the separator to be placed between different title parts of one property. | ”,” DE,EN_operating_instructions_PI-Fan |
| Guideline sort order | Number | Specify the order in which project guidelines are displayed in the project. Note: Metadata for a project can be predefined and additional information can be entered via project guidelines. | Comment = 1 |
| Hierarchy nesting level | Number | Control the hierarchy for the configurable folder structure of the ZIP export. Note: The system role Hierarchy level makes it possible to configure a folder structure for the Create ZIP package workflow. The Hierarchy nesting level attribute is added. | None |
*Assumed HTML/PDF title are two separate properties: Assumed HTML title and Assumed PDF title. Since they are mutually exclusive, they can be given the same attribute value.
** Title (HTML/PDF) are two separate properties: Title (HTML) and Title (PDF). Since they are mutually exclusive, they can be given the same attribute value.
Create attributes
Attributes are properties belonging to the class Attributes.
- Open the Properties view.
- Click the Add button and then click the button.
The Create properties dialogue opens. - In the field Class select Attribute from the drop-down list.
- In the field Data type select the desired data type for the values of the attribute.
- Enter a label for the attribute.
- Click the CREATE button.
The new attribute is saved and the dialogue is closed.
Assign attributes
To assign an attribute to a property, do the following:
- Open the Properties view.
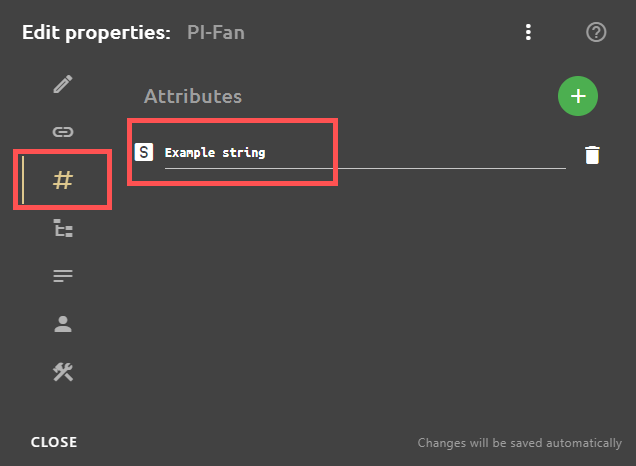
- On the property, click the button to open the Edit properties dialogue. The Edit properties dialogue opens
- Open the Attributes tab.
- Click the Add button.
- Select the desired attribute from the drop-down list and click CREATE NEW ATTRIBUTE.
The new attribute is added. - Enter the desired value.
- Close the Edit properties dialogue.
All your changes will be saved automatically.
Attribute quick edit
The Attribute quick edit provides a convenient way to adjust the values of an attribute for multiple properties at the same time. This is especially useful for attributes that control sort orders or priorities.
The Attribute quick edit can be displayed in the via the table view settings :
- Open the Properties view.
- Open the table view settings .
- In the drop-down list Attribute, select the desired attribute for which the Attribute quick edit should be displayed.
- Click outside the window to close the table view settings.
The Attribute quick edit is shown as an additional table column. The fields can now be used to directly edit attribute values of properties.