Content of this topic
This page guides you through the first steps and most important views in plusmeta. This is followed by two workflow examples that will show you the functional principle of workflows and projects.
Requirements
To get started, you need:
- an internet connection
- a browser
- a plusmeta account
Info: The plusmeta web application runs in the browser. No installation is required. For the best possible user experience we recommend the use of a modern browser (e.g. Chrome, Firefox, Safari).
First steps
- Open the mail from plusmeta (
notification@app.plusmeta.de) with your temporary password. If you have not received any mail yet, please check your spam folder or contact our support. - Open the plusmeta platform in your browser: https://app.plusmeta.de/login/.
- The workflow view is displayed as start page.
Check settings
-
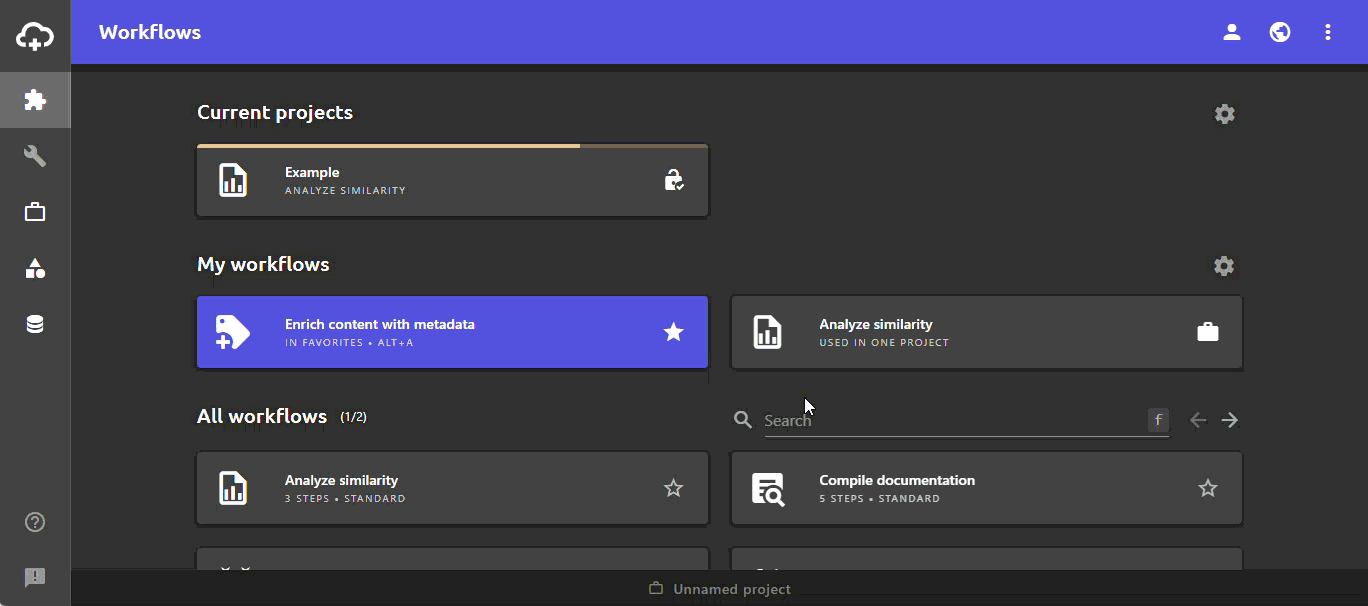
At the bottom of the Workflow View you see the All Workflows area. Here you can see all workflows that are available in your organization. Depending on the size of your browser window and the number of workflows, the area All Workflows may contain several pages:
-
Now check whether your user data is correct. To do this, go to the top right menu User settings. Click the button User profile to open the dialog Edit user profile.

Info: Depending on your rights, you may not be able to make changes to your user profile. In this case, contact a colleague with superuser rights or contact our support.
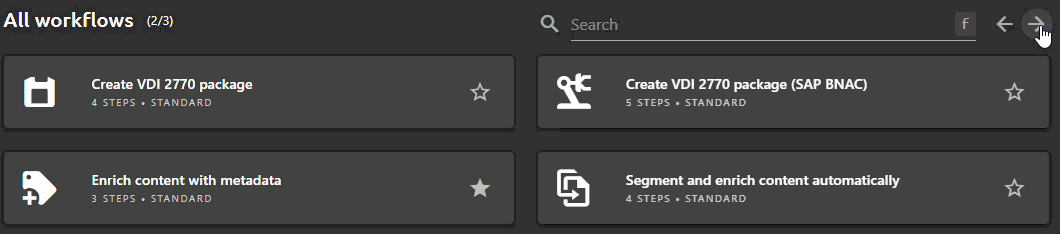
Application structure
-
In the view Workflows you can find your current projects and workflows.
-
In the view Work view you can find your currently active project.
-
In the view Projects you can find all your projects.
-
Once you have started a project, there is an additional bar at the bottom that allows you to switch between projects, workflows and workflow steps.
Getting stuck?
Contact supportStart workflow
Now you can start your first workflow! Go back to the workflow view .
In the following, two workflows are used to illustrate the functional principle of workflows in plusmeta. You may not have access to the relevant workflows. However, the process flow of the workflows in plusmeta is always very similar.
Workflow example 1: Similarity analysis
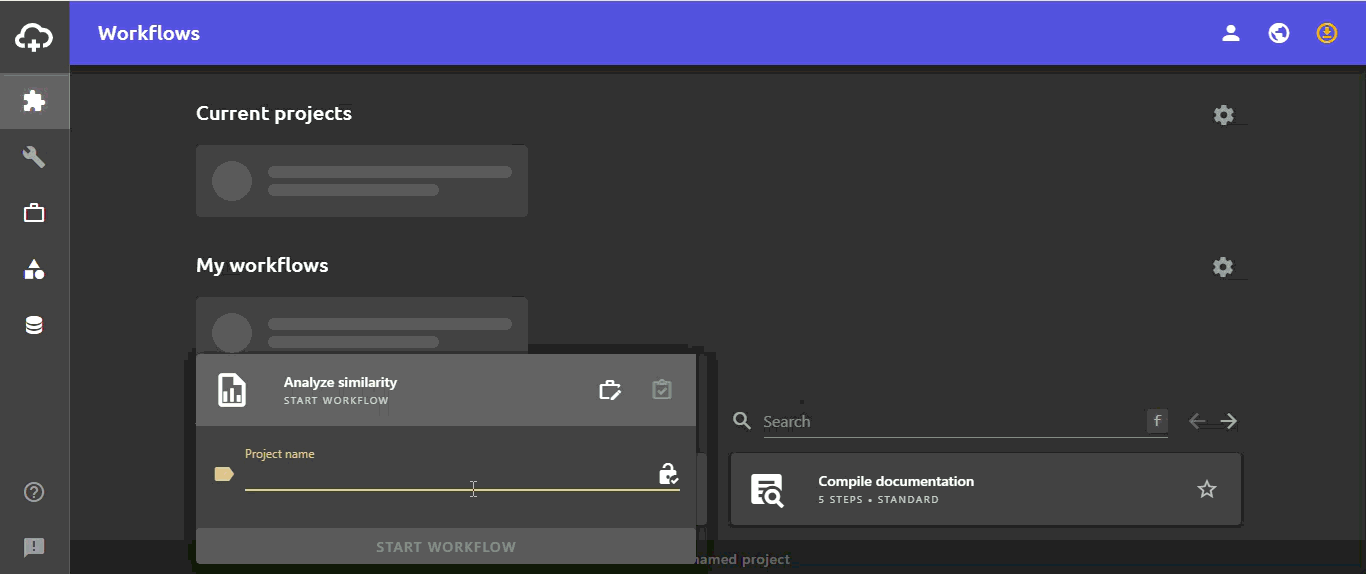
- Start a new project with the workflow Similarity analysis by clicking on the corresponding workflow.
- Define a project name and change the visibility of the project if necessary.
-
By clicking on the START WORKFLOW button, your project is created and you are automatically taken to the Work view in the first workflow step: Add content.
-
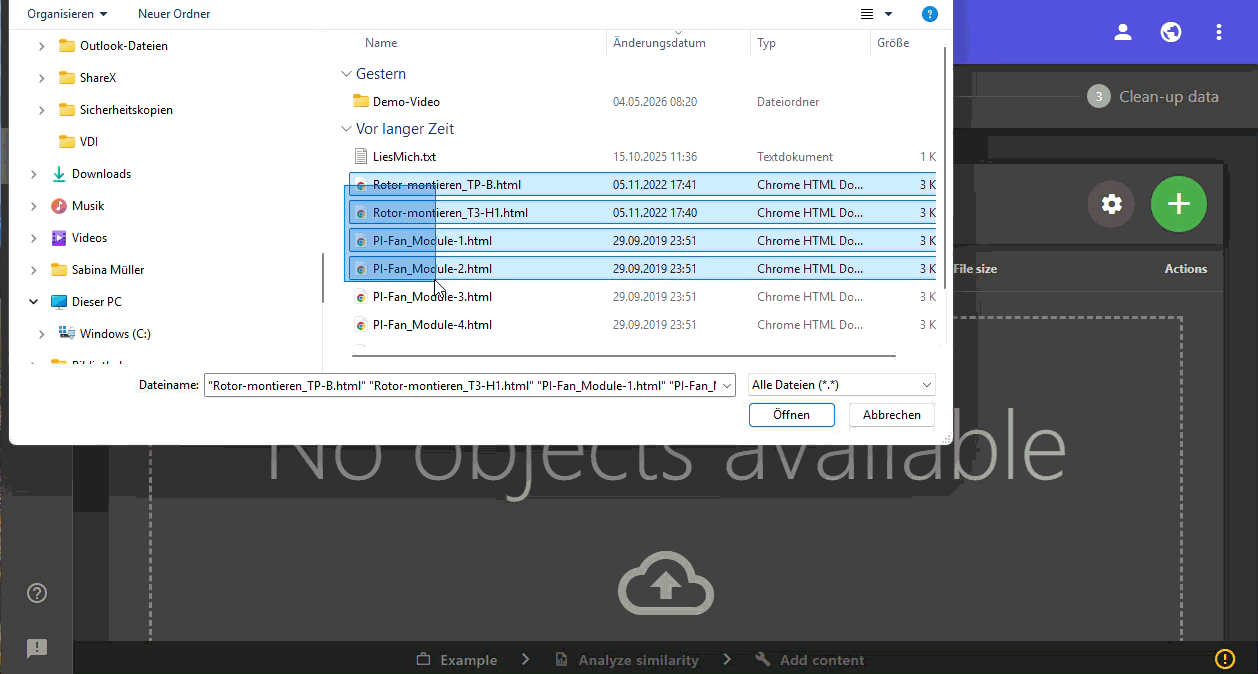
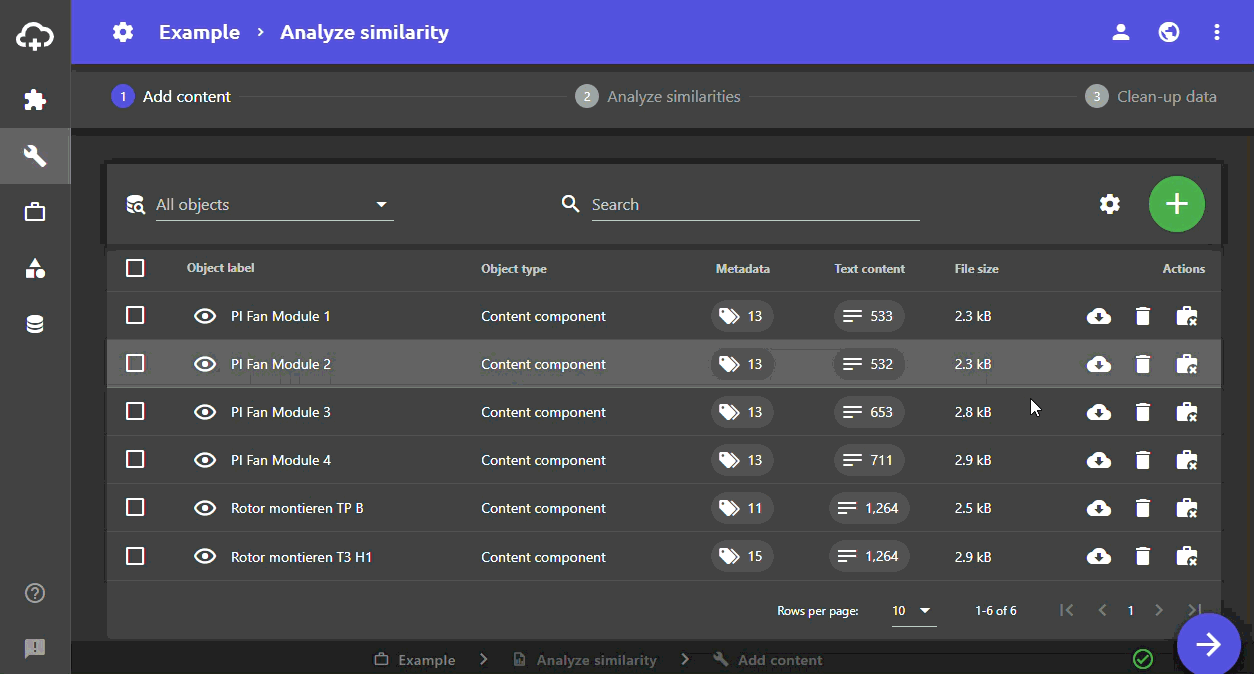
Now add content (PDFs, HTML files, etc.) to your project, for example via drag & drop or via the import function. It is also possible to add content from an existing project or already existing content to the project.
- Click the button at the bottom right to proceed to the next workflow step: Analyze similarities.
-
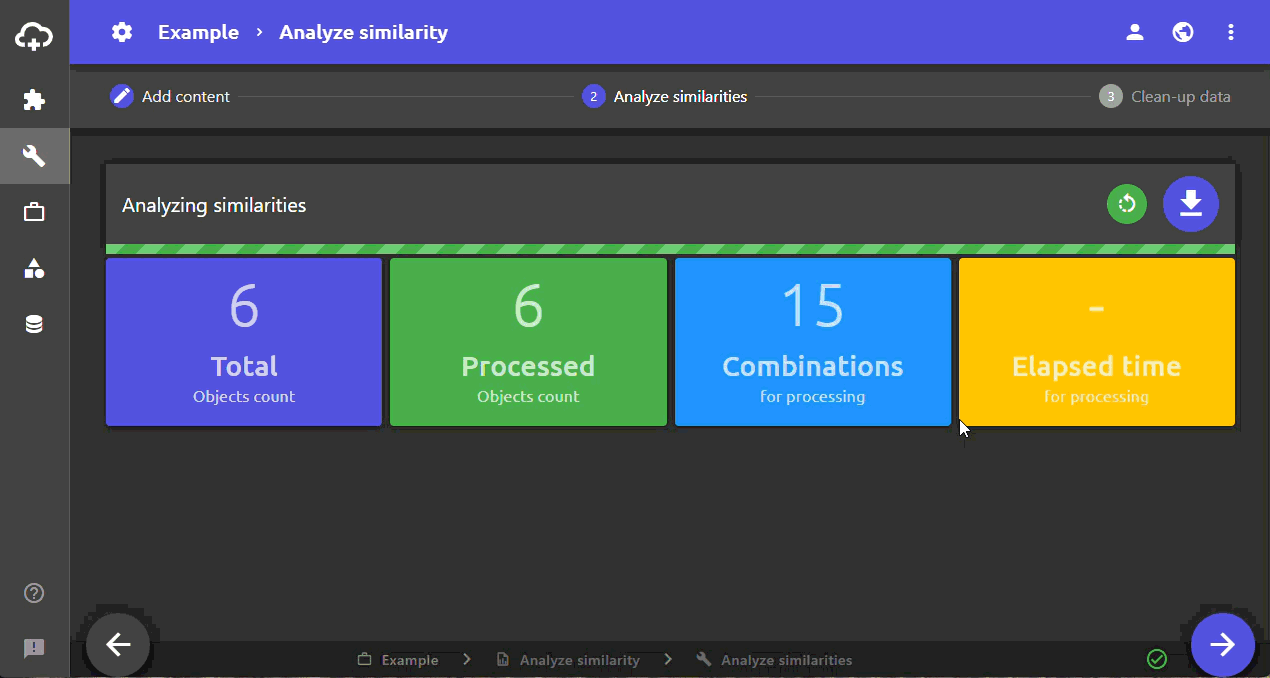
The similarity analysis now starts automatically:
-
Click the button at the bottom right to proceed to the next workflow step: Clean up data.
- In the last workflow step, the recognized similarities are now displayed.
- On the right, you can see a graphic representation of the contents between which the similarities exist.
- On the left, the blue box first shows the percentage of objects that were recognized as variants of another object. In the middle, the orange box shows for how many of the objects variants were detected. The red box indicates the number of detected duplicates.
-
The limit value is displayed under the coloured boxes. Here you can set from and to how many percent match, the objects are variants of each other. For example, if you set 30% as the lower limit value, the colored boxes are adjusted accordingly and all variant combinations from a match of 30% are displayed in the list below. Setting the limit value is therefore primarily a way for you to filter the displayed variants.
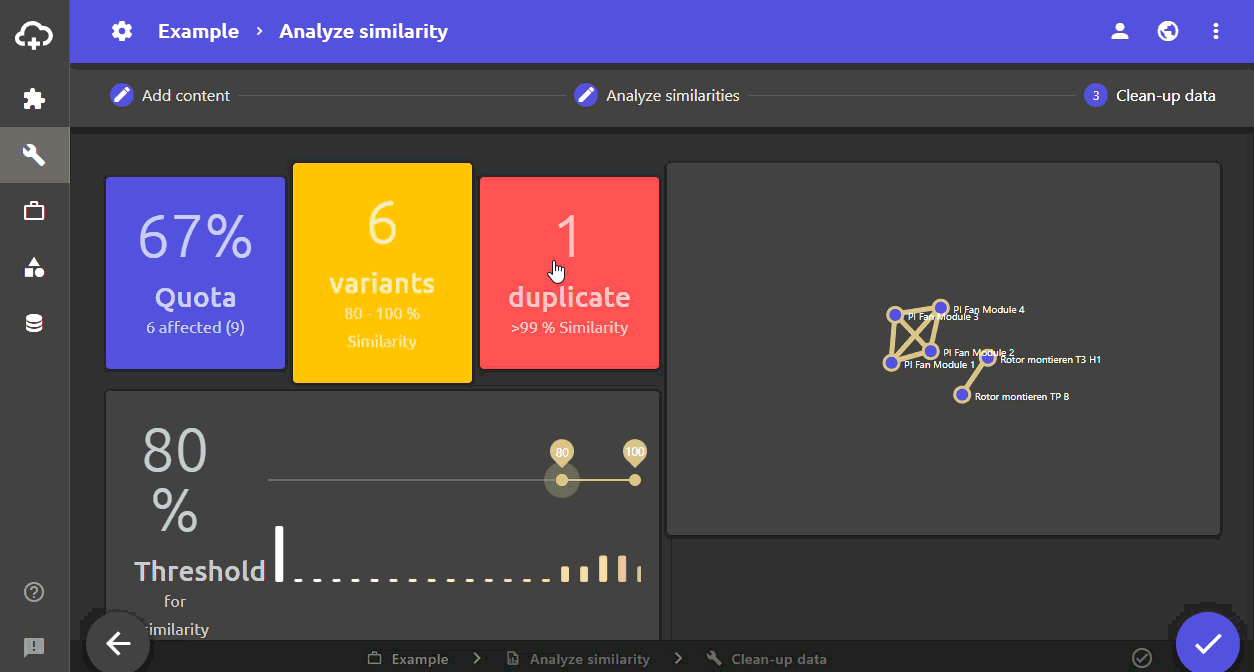
- If duplicates were detected, you can filter them out of the results by clicking on the red box. Two objects are only identified as duplicates if they match by more than 99%. Just one additional word is sufficient to classify the objects as variants of each other and not as duplicates.
- You get back to the variants by clicking on the orange box.
- Below the threshold value and the graphical representation of the results the similarities of two objects are listed. The number in the beige circle indicates the percentage of similarity between the two objects.
- What is displayed in the list can be restricted by the limit values, by clicking on a specific object in the graphical display or by manually setting a filter.
- By clicking on a line, you can view the differences in detail. In the preview the identical contents are integrated into each other and the differences are highlighted in color.
- Click on the beige circle to mark the two objects as checked. The circle will then turn into a green tick and the connection between the two objects in the graphical display will also turn green.

- By clicking you can close the project and return to the Workflows view.
Getting stuck?
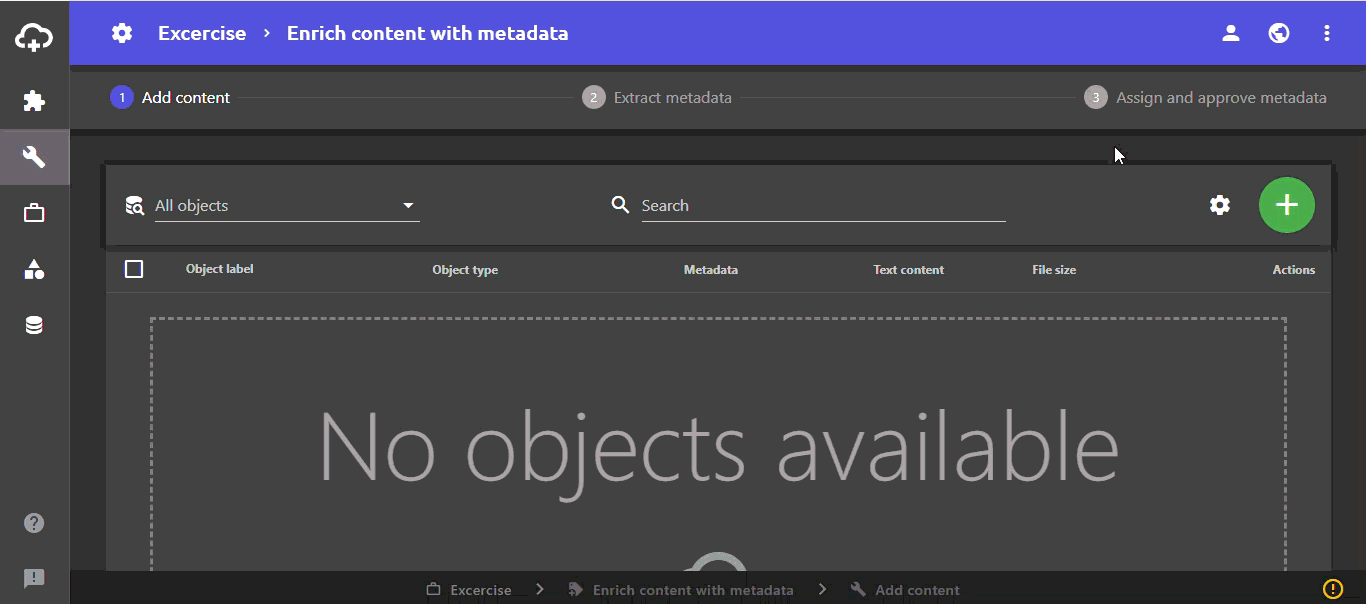
Contact supportWorkflow example 2: Enrich content with metadata
- Start a new project with the workflow Enrich content with metadata by clicking on the corresponding workflow.
- Define a project name and change the visibility of the project if necessary.
- By clicking on the START WORKFLOW button, your project is created and you are automatically taken to the Work view in the first workflow step: Add content.
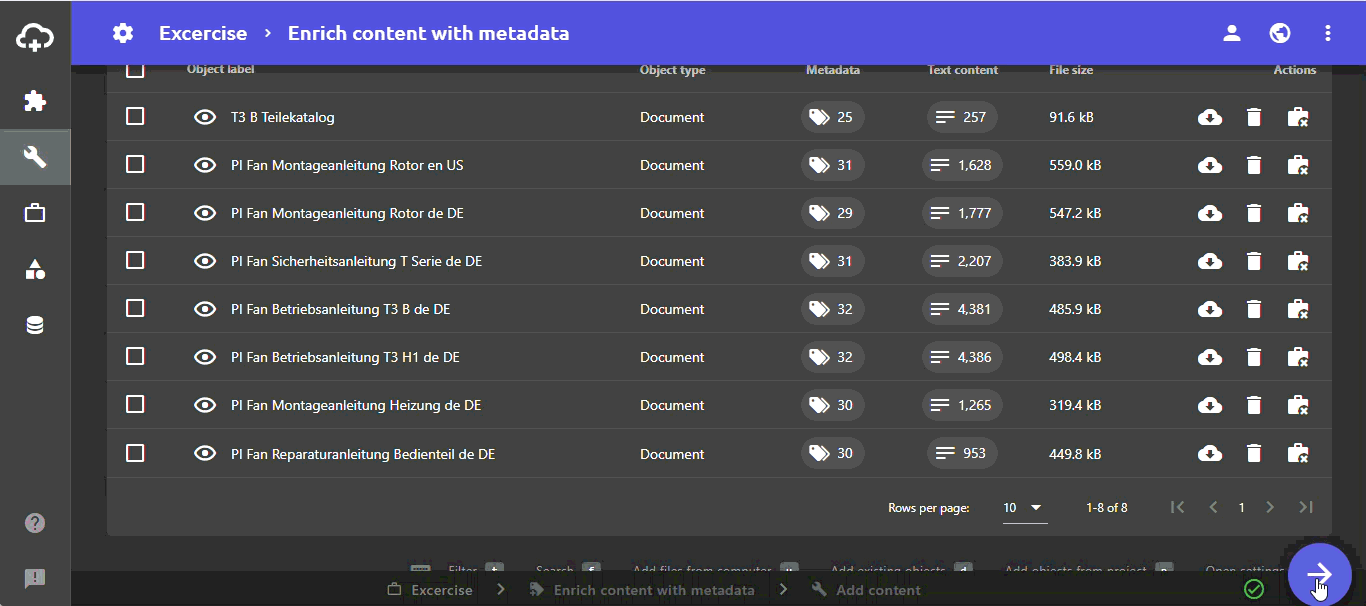
- Now add content (PDFs, HTML files, etc.) to your project, for example via drag & drop or via the import function. It is also possible to add content from an existing project or already existing content to the project.
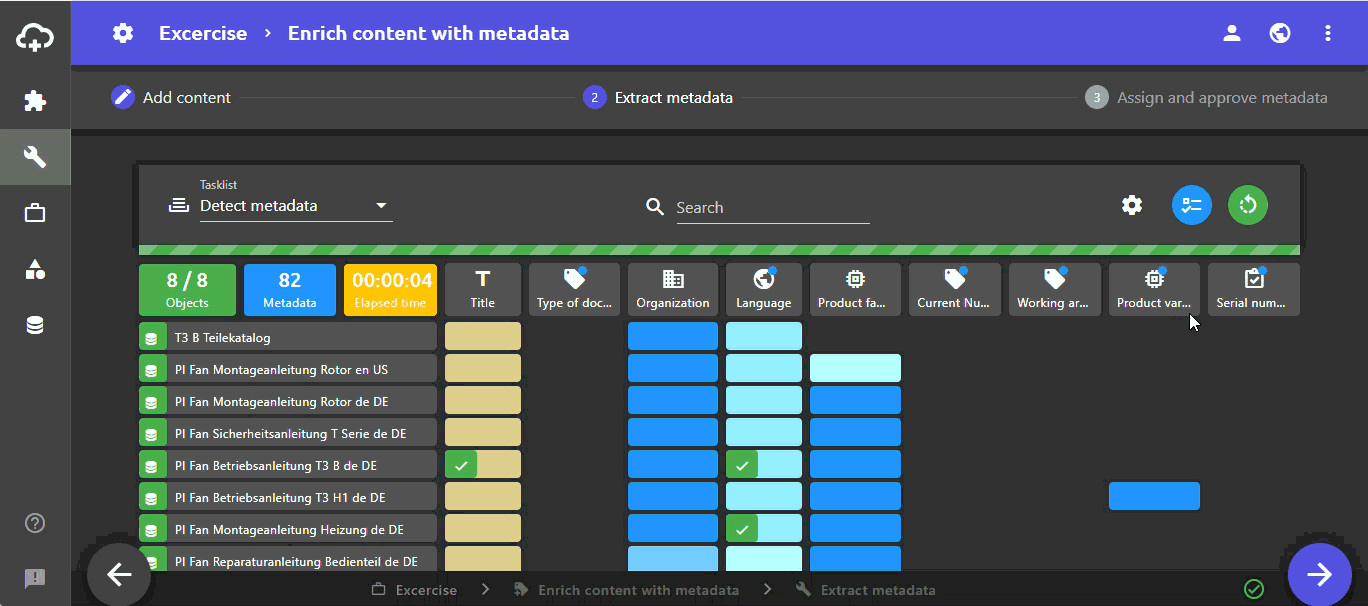
- Click the button at the bottom right to proceed to the next workflow step: Extract metadata. Metadata recognition now runs automatically. In the colored boxes you can see the number of processed objects and the detected metadata as well as the time needed.
- Click the button at the bottom right to proceed to the next workflow step: Assign and approve metadata.
Info: If the software is not pre-configured for you, the results of automatic metadata detection will be not be optimal. The reason for this is that there are only a few preset metadata and properties in the system. To get better results, you need to transfer your metadata to the system.
- In the workflow step Assign and approve metadata, you can display and approve the results of the metadata detection. You can also change detected metadata and add additional metadata.
- By clicking at the bottom right you close and end the project and return to the Workflows view.