Content of this topic
- Add objects via drag & drop
- Add objects using the Add button
- Customize view
- Delete individual objects
- Delete multiple objects
Add objects (PDFs, HTML files, etc.) via drag & drop or via the import function to your project. It is also possible to add objects from another project or already existing objects to the project.
Add objects via drag & drop
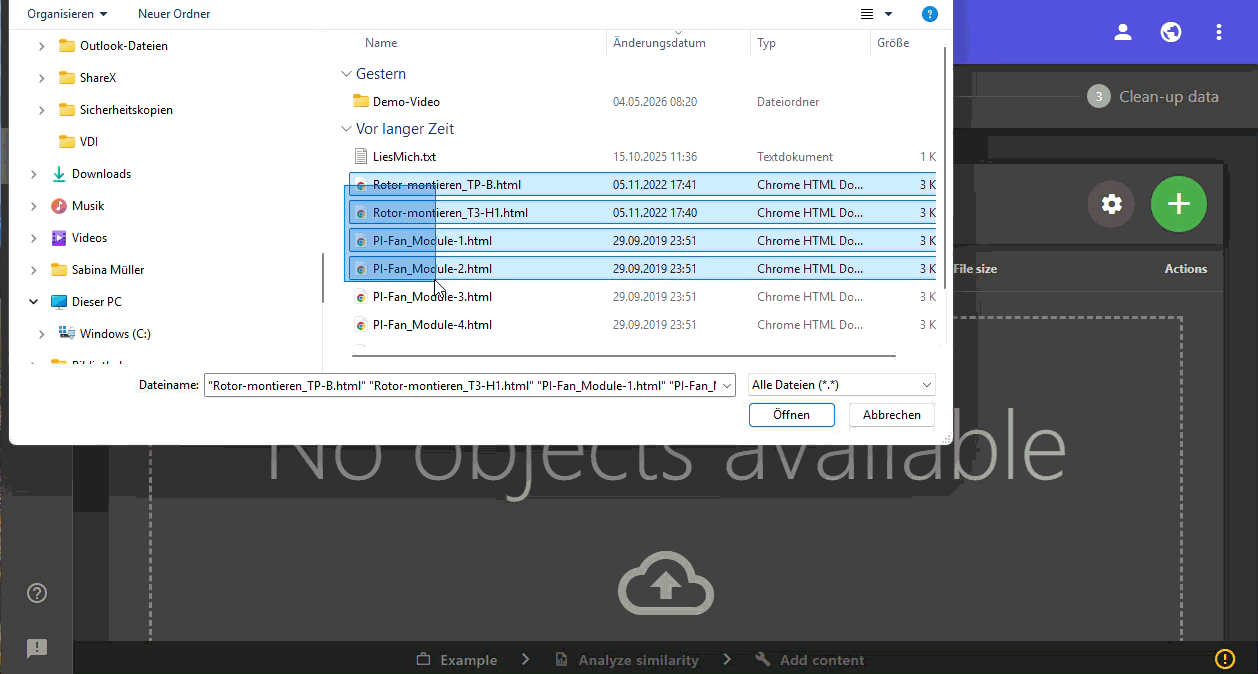
One or more objects can be added by drag & drop.
- Open the location of the files you want to add in the file manager of the operating system (e.g. Windows Explorer or macOS Finder).
- Place the file manager window above or next to the browser window.
- Select one or more files in the file manager.
Note: Files inside a ZIP file must be unpacked first.
- Drag and drop selected files from the object table into the browser window.
Add objects using the Add button
Add objects (PDFs, HTML files, etc.) to your project using the Add button.
- Click the Add button. Three buttons appear that can be used to add objects from different sources:
- Add objects from your computer
- Add existing objects: If you have already uploaded the objects you are looking for to plusmeta, you can find them here.
- Add objects from an existing project: If you already have another project in where you have exactly the objects you need for the current project, you can find and select the corresponding project and import the associated objects.
- Click the button with the appropriate option and add your files. The files are now uploaded in the background and appear in the objects list.
Customize view
You can use the button to adjust settings for the table view of the objects.
File preview
You can use the button to open a quick preview of the object.
Additional information
You can use the button in the Object label column to open the quick preview. For object types for which no quick preview is available, the button remains disabled:For more information, see the section File preview of the 'Customize table views' help page.
Download source file
Use the button to download objects.
Additional information
The download function can be used for supported objects with the button in the Actions column. If the file already exists locally, a different icon is used: For objects for which no source file is available, the button is disabled.For more information, see the section Download source file section of the 'Customize table views' help page.
Edit Columns.
You can use the drop-down list with the icon to edit the columns of the table view. You can remove columns and add additional columns.
Additional information
The drop-down list with all the usable columns can be expanded next to the icon. By activating or deactivating the checkboxes, columns are added or removed from the table view.For more information, see the section Edit columns section of the 'Customize table views' help page.
Delete individual objects
Within a table row, you can use the two buttons and to delete or remove an already added object from the project.
- Remove object from the project. The object will not be deleted and can be used elsewhere on the plusmeta platform.
- Delete object. Object is only used in this project.
- Delete object. The object is used in projects other than the current one and will be deleted in all projects.
Delete multiple objects
If at least one object has been selected via the selection fields of the table, you can use the and buttons to delete or remove already added objects from the project.
- Remove objects from the project.
- Delete objects.
Note: If one of the selected objects is used in another project, this option is disabled.